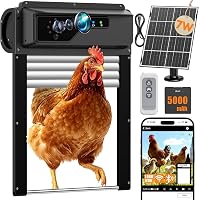
How Do You Install an Automatic Chicken Coop Door?
To install an automatic chicken coop door, measure the opening, mount the door square and securely, then test its travel before setting the controls. Follow the door's instructions for its hardware, wiring, and safety checks.
On this page (6 sections)
- What should you check before installing an automatic chicken coop door?
- How do you mount an automatic chicken coop door?
- How do you connect power and set the controls?
- How do you test the door safely?
- What should you do after installation?
- Which automatic chicken coop door installation details matter most?
To install an automatic chicken coop door, measure the opening, mount the door square and securely, and test its movement before setting a schedule. The exact steps depend on the door, so follow its instructions for mounting, power, and safety checks.
Start by choosing a mounting spot with a clear path for the door. Confirm that the frame fits the opening, that the coop wall can hold it, and that bedding or debris won't block its movement.
What should you check before installing an automatic chicken coop door?
Before you install an automatic chicken coop door, check the opening size, mounting surface, and available space for the moving door. Compare those measurements with the specific door's instructions.
Measure the rough opening at the top, middle, and bottom. If the measurements vary, use the narrowest width and height when checking fit.
Also check what sits above, below, and beside the opening. A roost, ramp, wire edge, or thick bedding can obstruct the door or crowd chickens as they pass.
Your coop door opening also needs to suit your flock. Review how big a chicken coop door should be before cutting or enlarging an opening.
FarmLite's rough opening measurement is about 10.5 in tall by 8.5 in wide. Check the instructions for the exact installation requirements before making a cut.
How do you mount an automatic chicken coop door?
Mount the door according to its instructions, keeping the frame aligned and the moving section clear. A square, stable fit helps the door move without catching.
Mark the mounting points and check that the frame sits flat against the coop surface. Use the hardware supplied or specified for the door and wall material.
The Run-Chicken T50 is described as mounting with 6 screws and needing no wiring. Its battery power can suit a coop where routing a cable would be difficult.
Do not guess at screw length or placement if the instructions specify them. If the wall is damaged, soft, or too thin to hold the frame, fix that support before hanging the door.
Some doors fit only certain coop arrangements. Omlet says its door works with wooden coops and can open left or right, while direct fitting is available for the Omlet Eglu Cube and Eglu Pro.
For more choices, see our guide to automatic chicken coop door openers. Check the opening and mounting details for your chosen setup before installing.
How do you connect power and set the controls?
Use only the power method and control setup specified for your door. Set its clock or light sensor after installation, then confirm that the door responds as expected.
A battery powered system may need batteries inserted before you mount it or after, depending on its instructions. Check the recommended battery type and orientation, and keep the control panel accessible for future adjustments.
The VEVOR door also describes light sensor control and remote control. Confirm which options are available on the version you have and follow its instructions for pairing or setup.
FarmLite offers timer or light sensor operation and multiple power options. Its solar setup is not included, and a 12V solar setup is required if you choose solar power.
Decide whether a timer or light sensor better matches your flock's routine. A timer lets you set specific times, while light sensor operation responds to daylight; the right choice depends on your coop location and the schedule you want.
How do you test the door safely?
Watch the door complete several full cycles before leaving it to run unattended. Keep chickens clear during the first tests and confirm that the door stops or responds as its safety instructions describe.
Check that the moving door does not rub against the frame, snag on bedding, or leave a gap when closed. If it sticks or sits crooked, stop and correct the alignment before relying on it.
If the door has an obstruction sensor, test it only by the method described in its manual. FarmLite describes an infrared motion sensor, while Run-Chicken and Omlet describe safety sensors; don't assume every model uses the same test.
Keep the opening area clear of feed bowls, ramps, and loose bedding. A clear approach gives chickens room to pass and makes it easier to spot a problem during a test cycle.
What should you do after installation?
Check the door daily at first, then inspect it as part of normal coop care. Look for loose fasteners, dirt in the track, changes in alignment, and a schedule that no longer fits daylight or flock habits.
Follow the manufacturer's cleaning and maintenance instructions. Replace or recharge batteries as directed, and keep the power source and control panel dry as required by the door's design.
If your coop has other setup needs, our guides explain where to put a chicken coop in your yard and how to keep rats out of a chicken coop. Both can help you plan a safer route and cleaner area around the entrance.
Which automatic chicken coop door installation details matter most?
For a reliable installation, fit the frame to the measured opening, secure it to a sound surface, keep the travel path clear, and test the controls and safety features. The door's instructions should decide the exact mounting and power steps.
Choose a battery door if you want to avoid running a cable, or a timer and light sensor model if you want a choice of schedule. Before buying, compare your opening with the door's stated dimensions and confirm it suits your coop type.
For a broader look at options and features, see Wi-Fi chicken coop doors or our Omlet automatic door review. If your coop opening needs changing, measure again before cutting.
Frequently asked questions
Can I install an automatic chicken door on any coop?
Many automatic doors can fit wooden coops, but the opening and mounting surface must suit the specific door. Measure the rough opening, check the frame and door travel, and follow the manufacturer's instructions.
Some systems are designed for certain coop models or need a separate frame.
Should an automatic chicken coop door use a timer or light sensor?
A timer gives you set opening and closing times, while a light sensor follows changing daylight. Choose based on your flock's routine and how much control you want.
Whichever mode you use, watch the door through a full cycle and confirm the timing keeps the flock inside safely at night.
How do I check an automatic coop door after installation?
Run several opening and closing cycles while watching the doorway and the door's full path. Check that it moves freely, stays aligned, and responds to its safety feature as the manual describes.
Recheck fasteners and settings after the first day of use.
Can I install an automatic coop door myself?
Many battery powered doors are designed for straightforward installation, but the task depends on the coop, door, and instructions. You may need help holding a frame in place or cutting an opening.
Use the supplied hardware and tools where specified, and ask a qualified person about any unfamiliar wiring.